
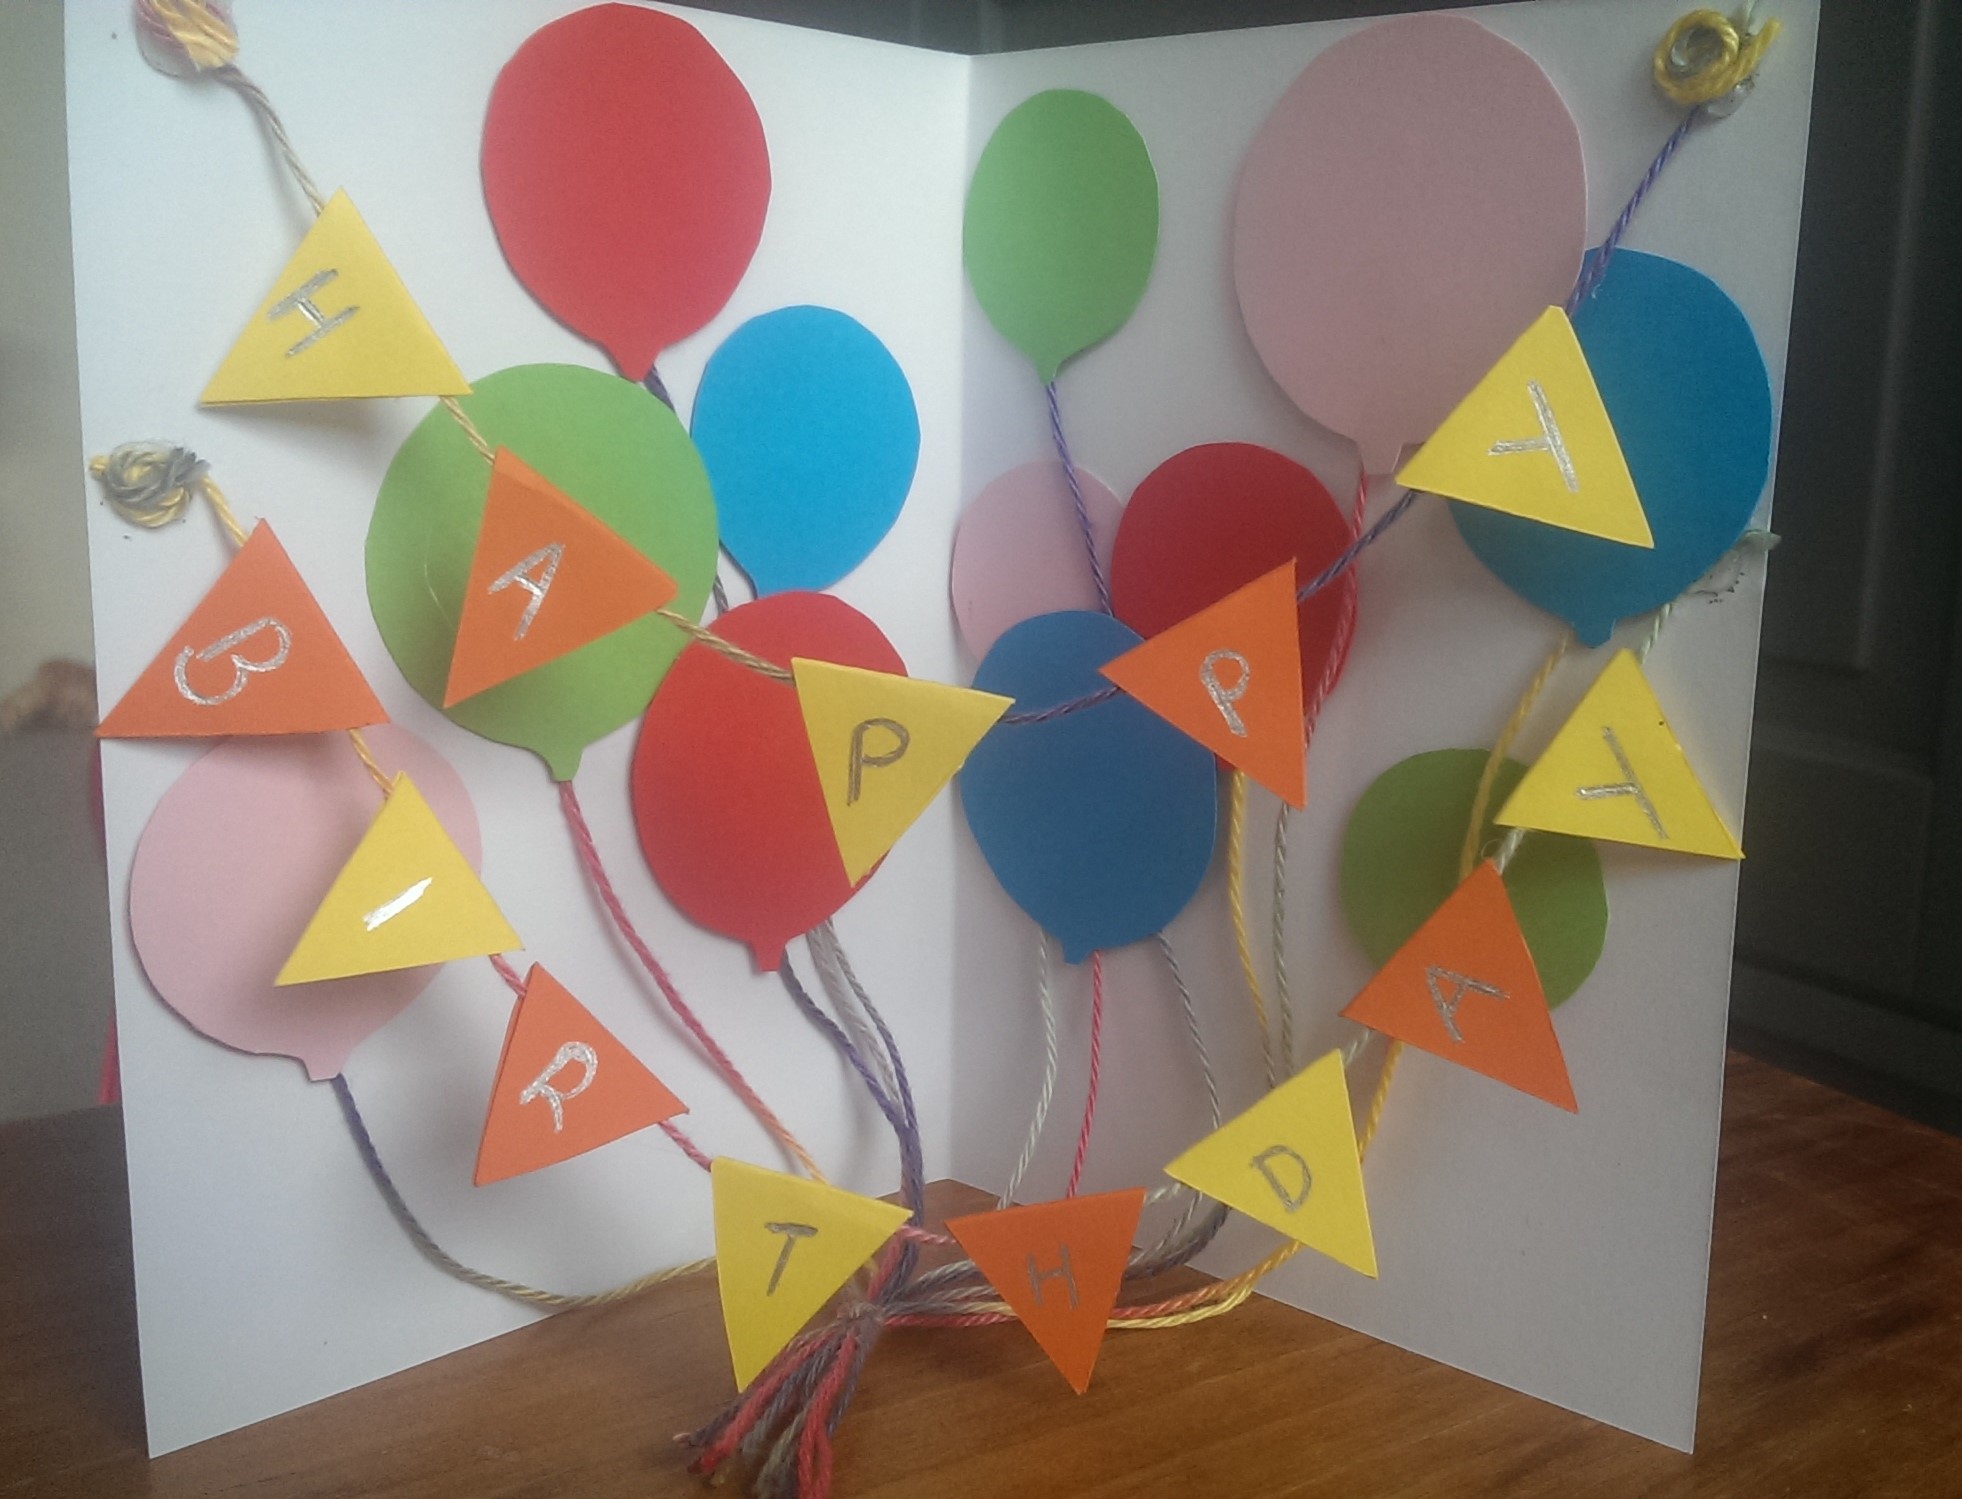
Homemade birthday cards are a thoughtful (and sometimes thrifty) alternative to buying from the newsagents. However they don’t have to be boring!
Enter the DIY surprise balloon card.
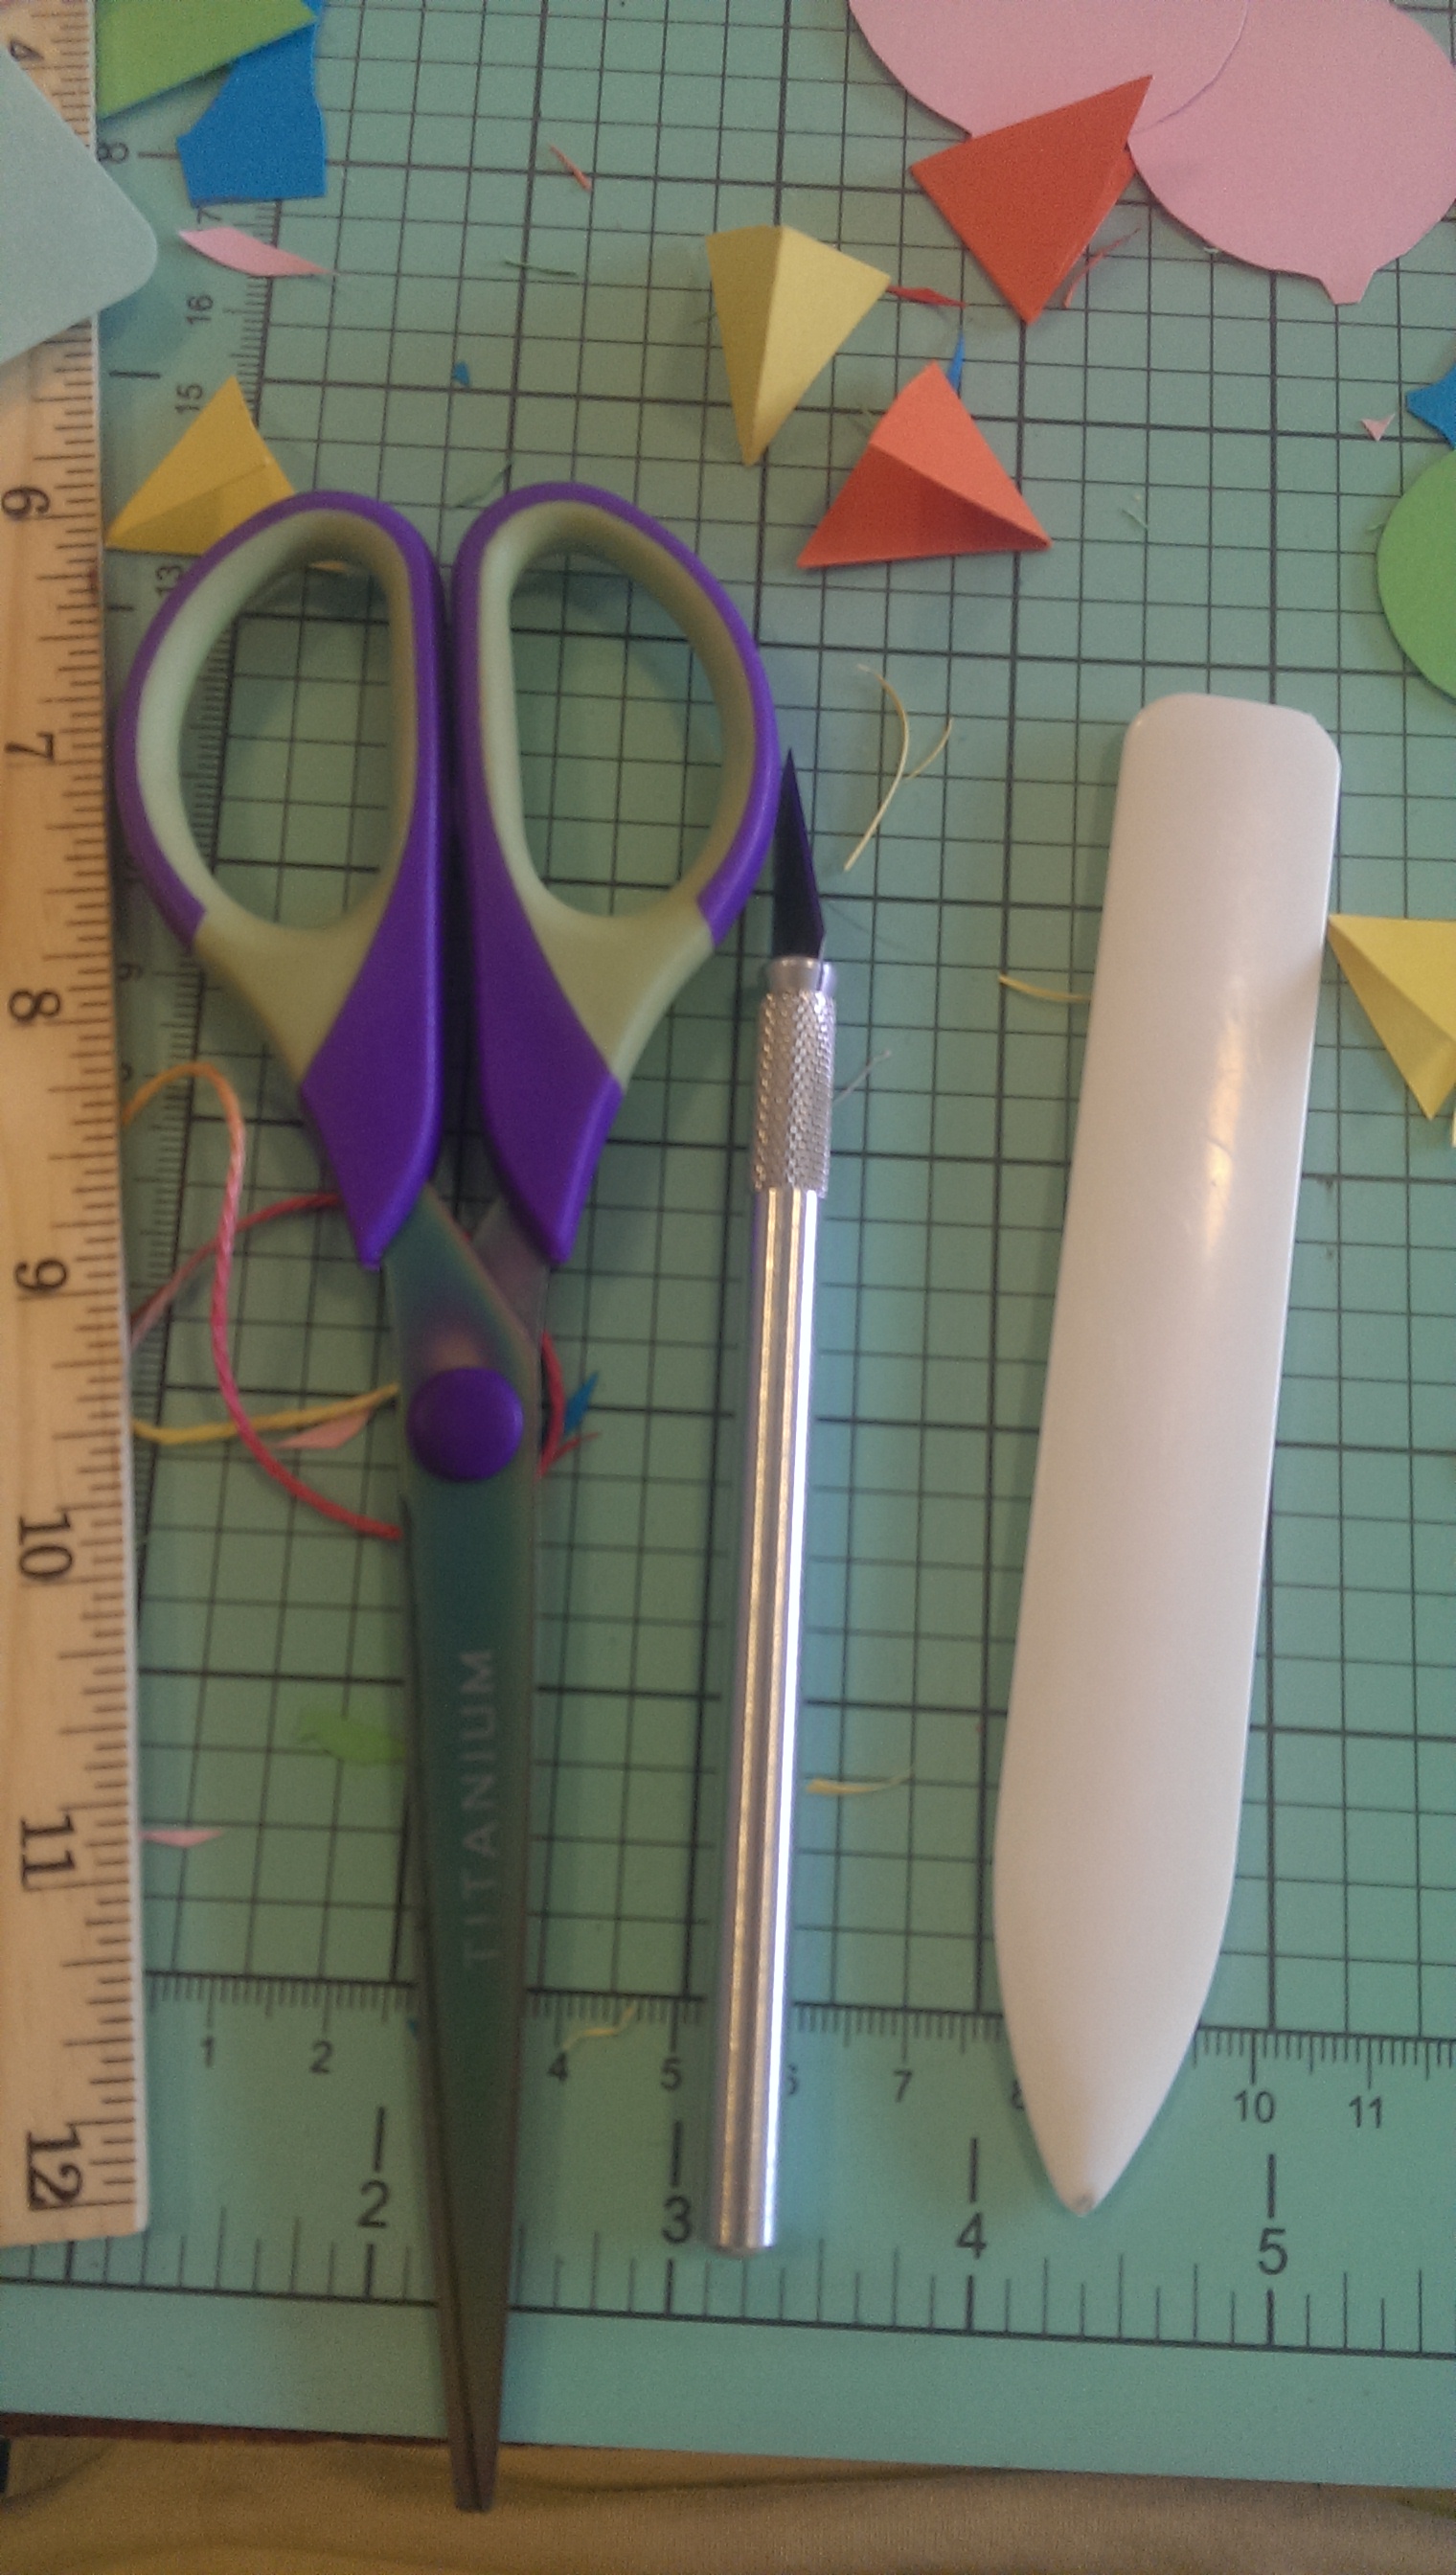
Materials:
- Coloured card (as you desire, here I have used A5, but you can go much bigger!)
- Scissors and / or precision cutter
- Paper glue and/or low temp glue gun and/or foam photo sticky dots
- Thin coloured string (I used a very fine wool from a knitting project never attempted!)
- Paper bone scorer (optional)
Choose your colours: I used white as the card, had yellow and orange alternating for the miniature bunting sign and blue, green, red and pink for the balloons. Use the paper bone scorer to half and then fold the paper you wish to have has the card, now leave to the side.
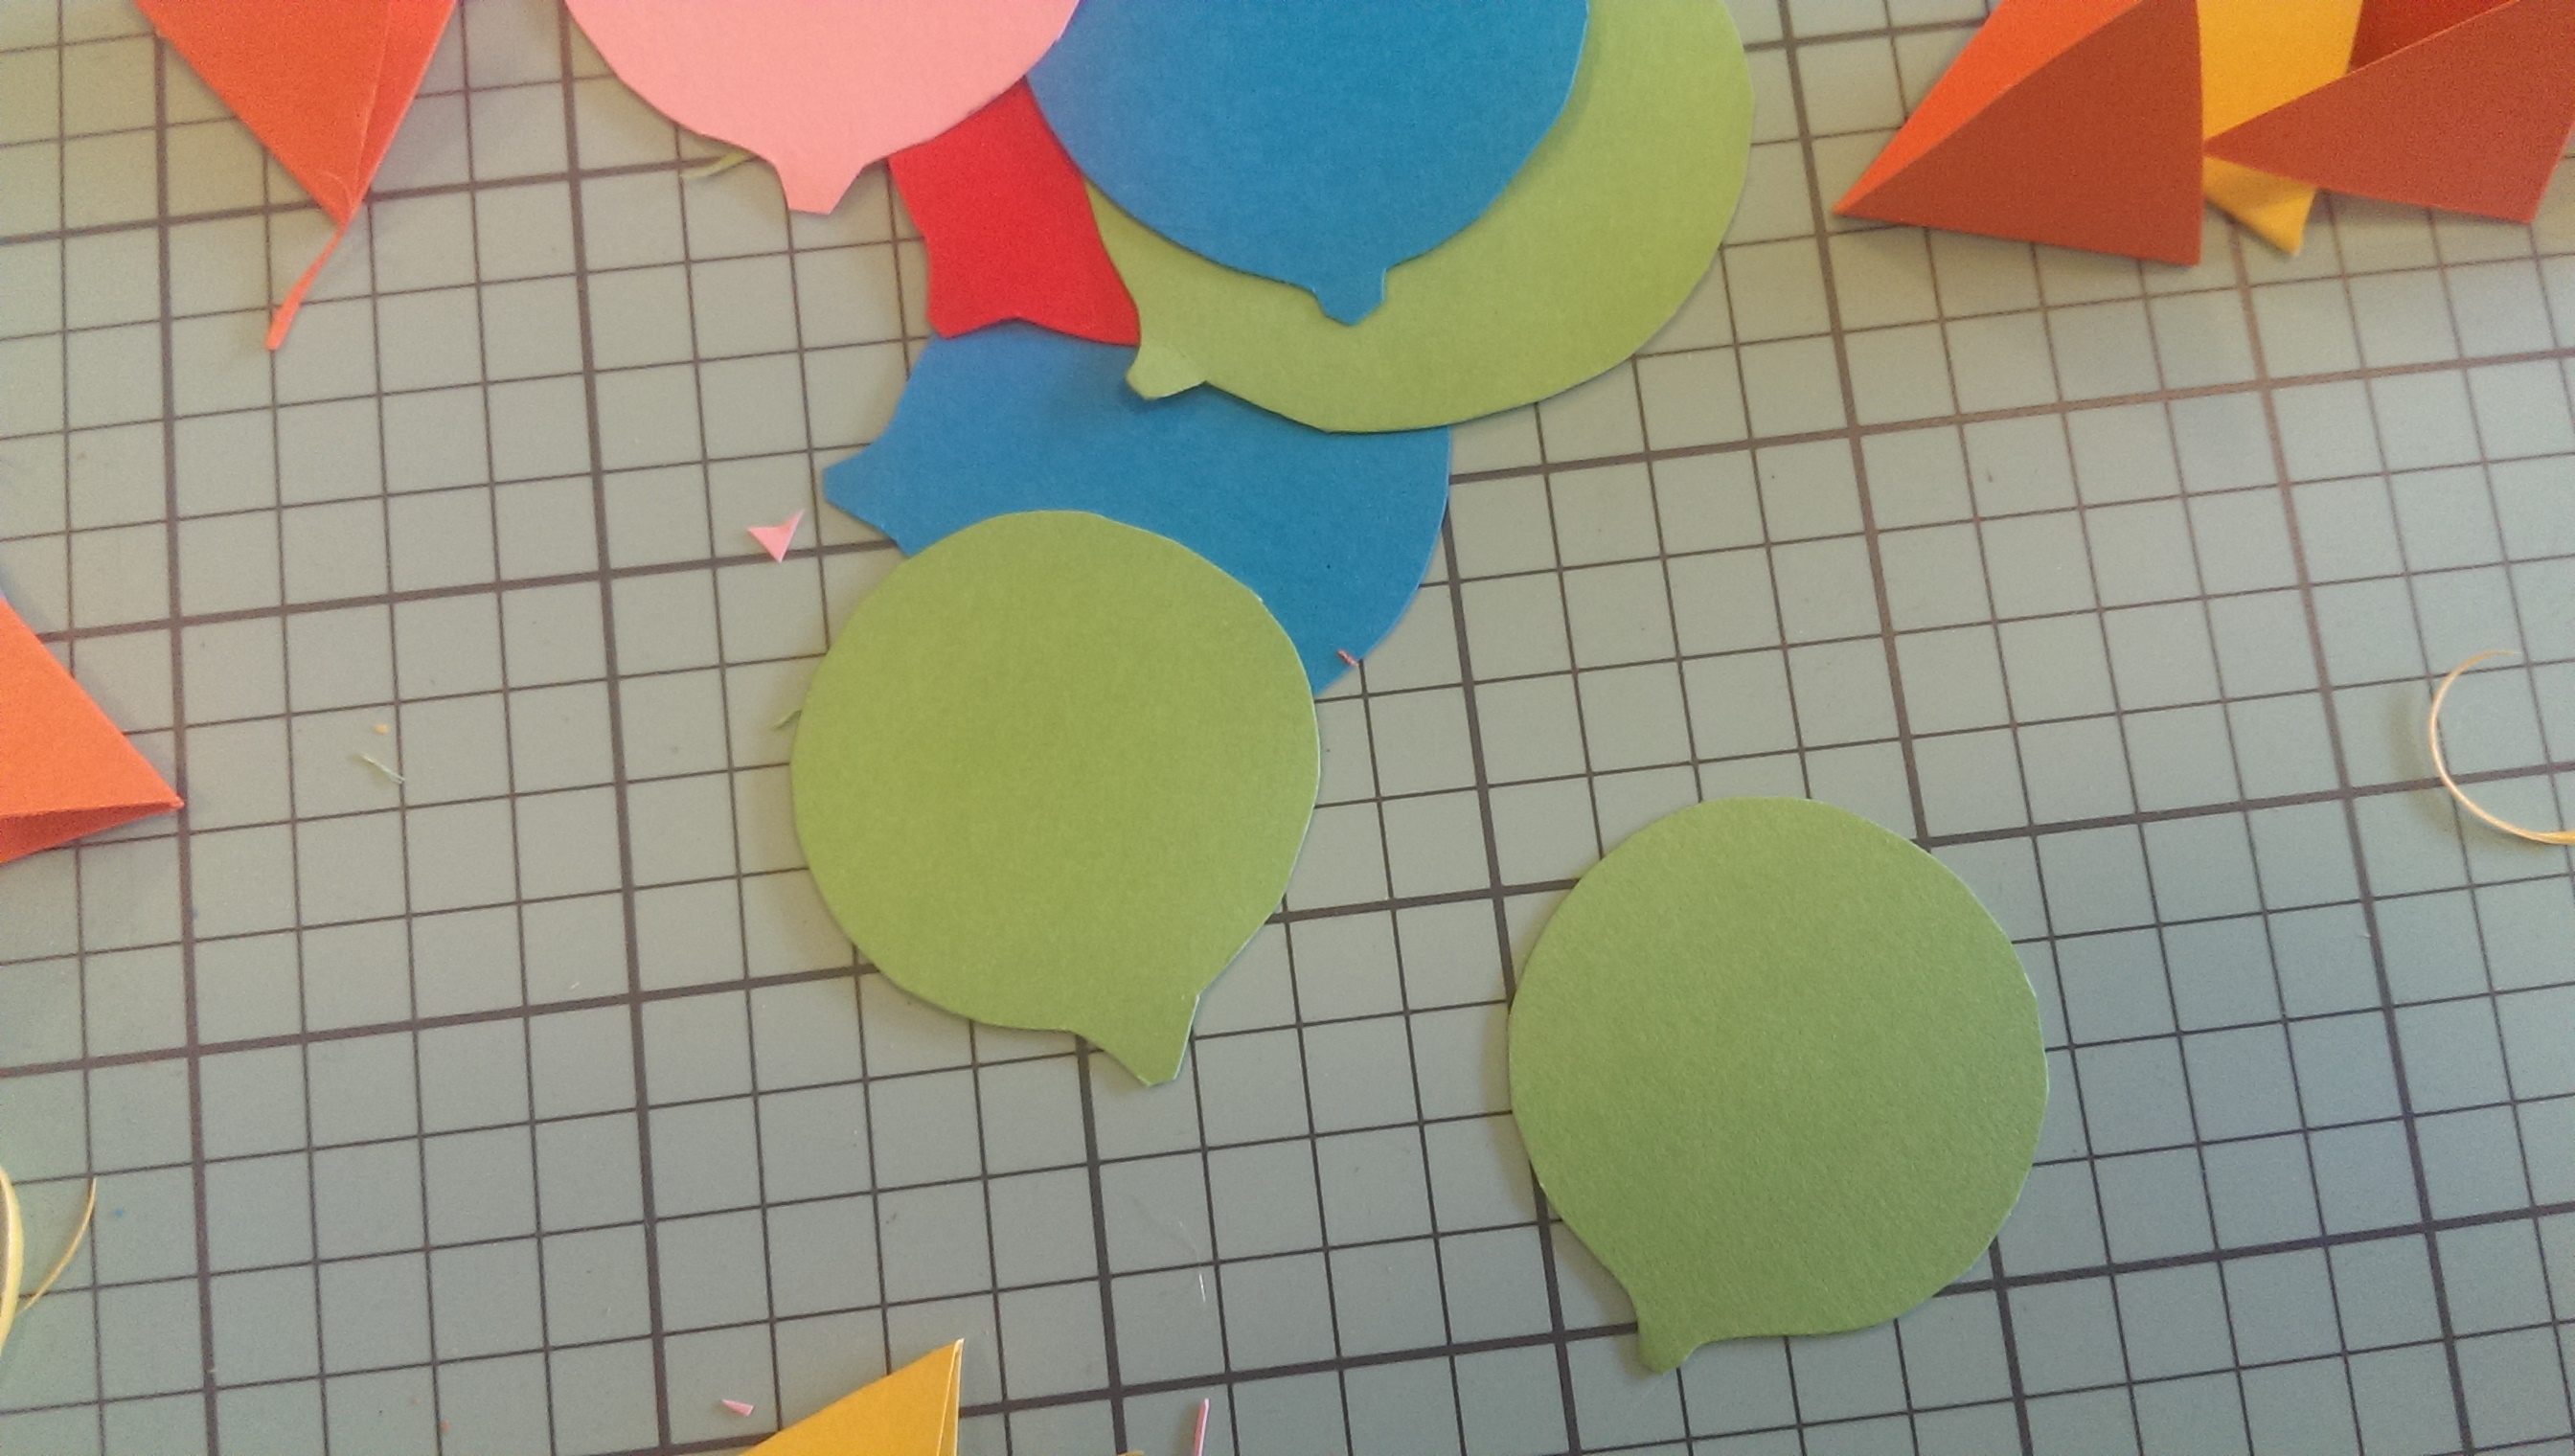
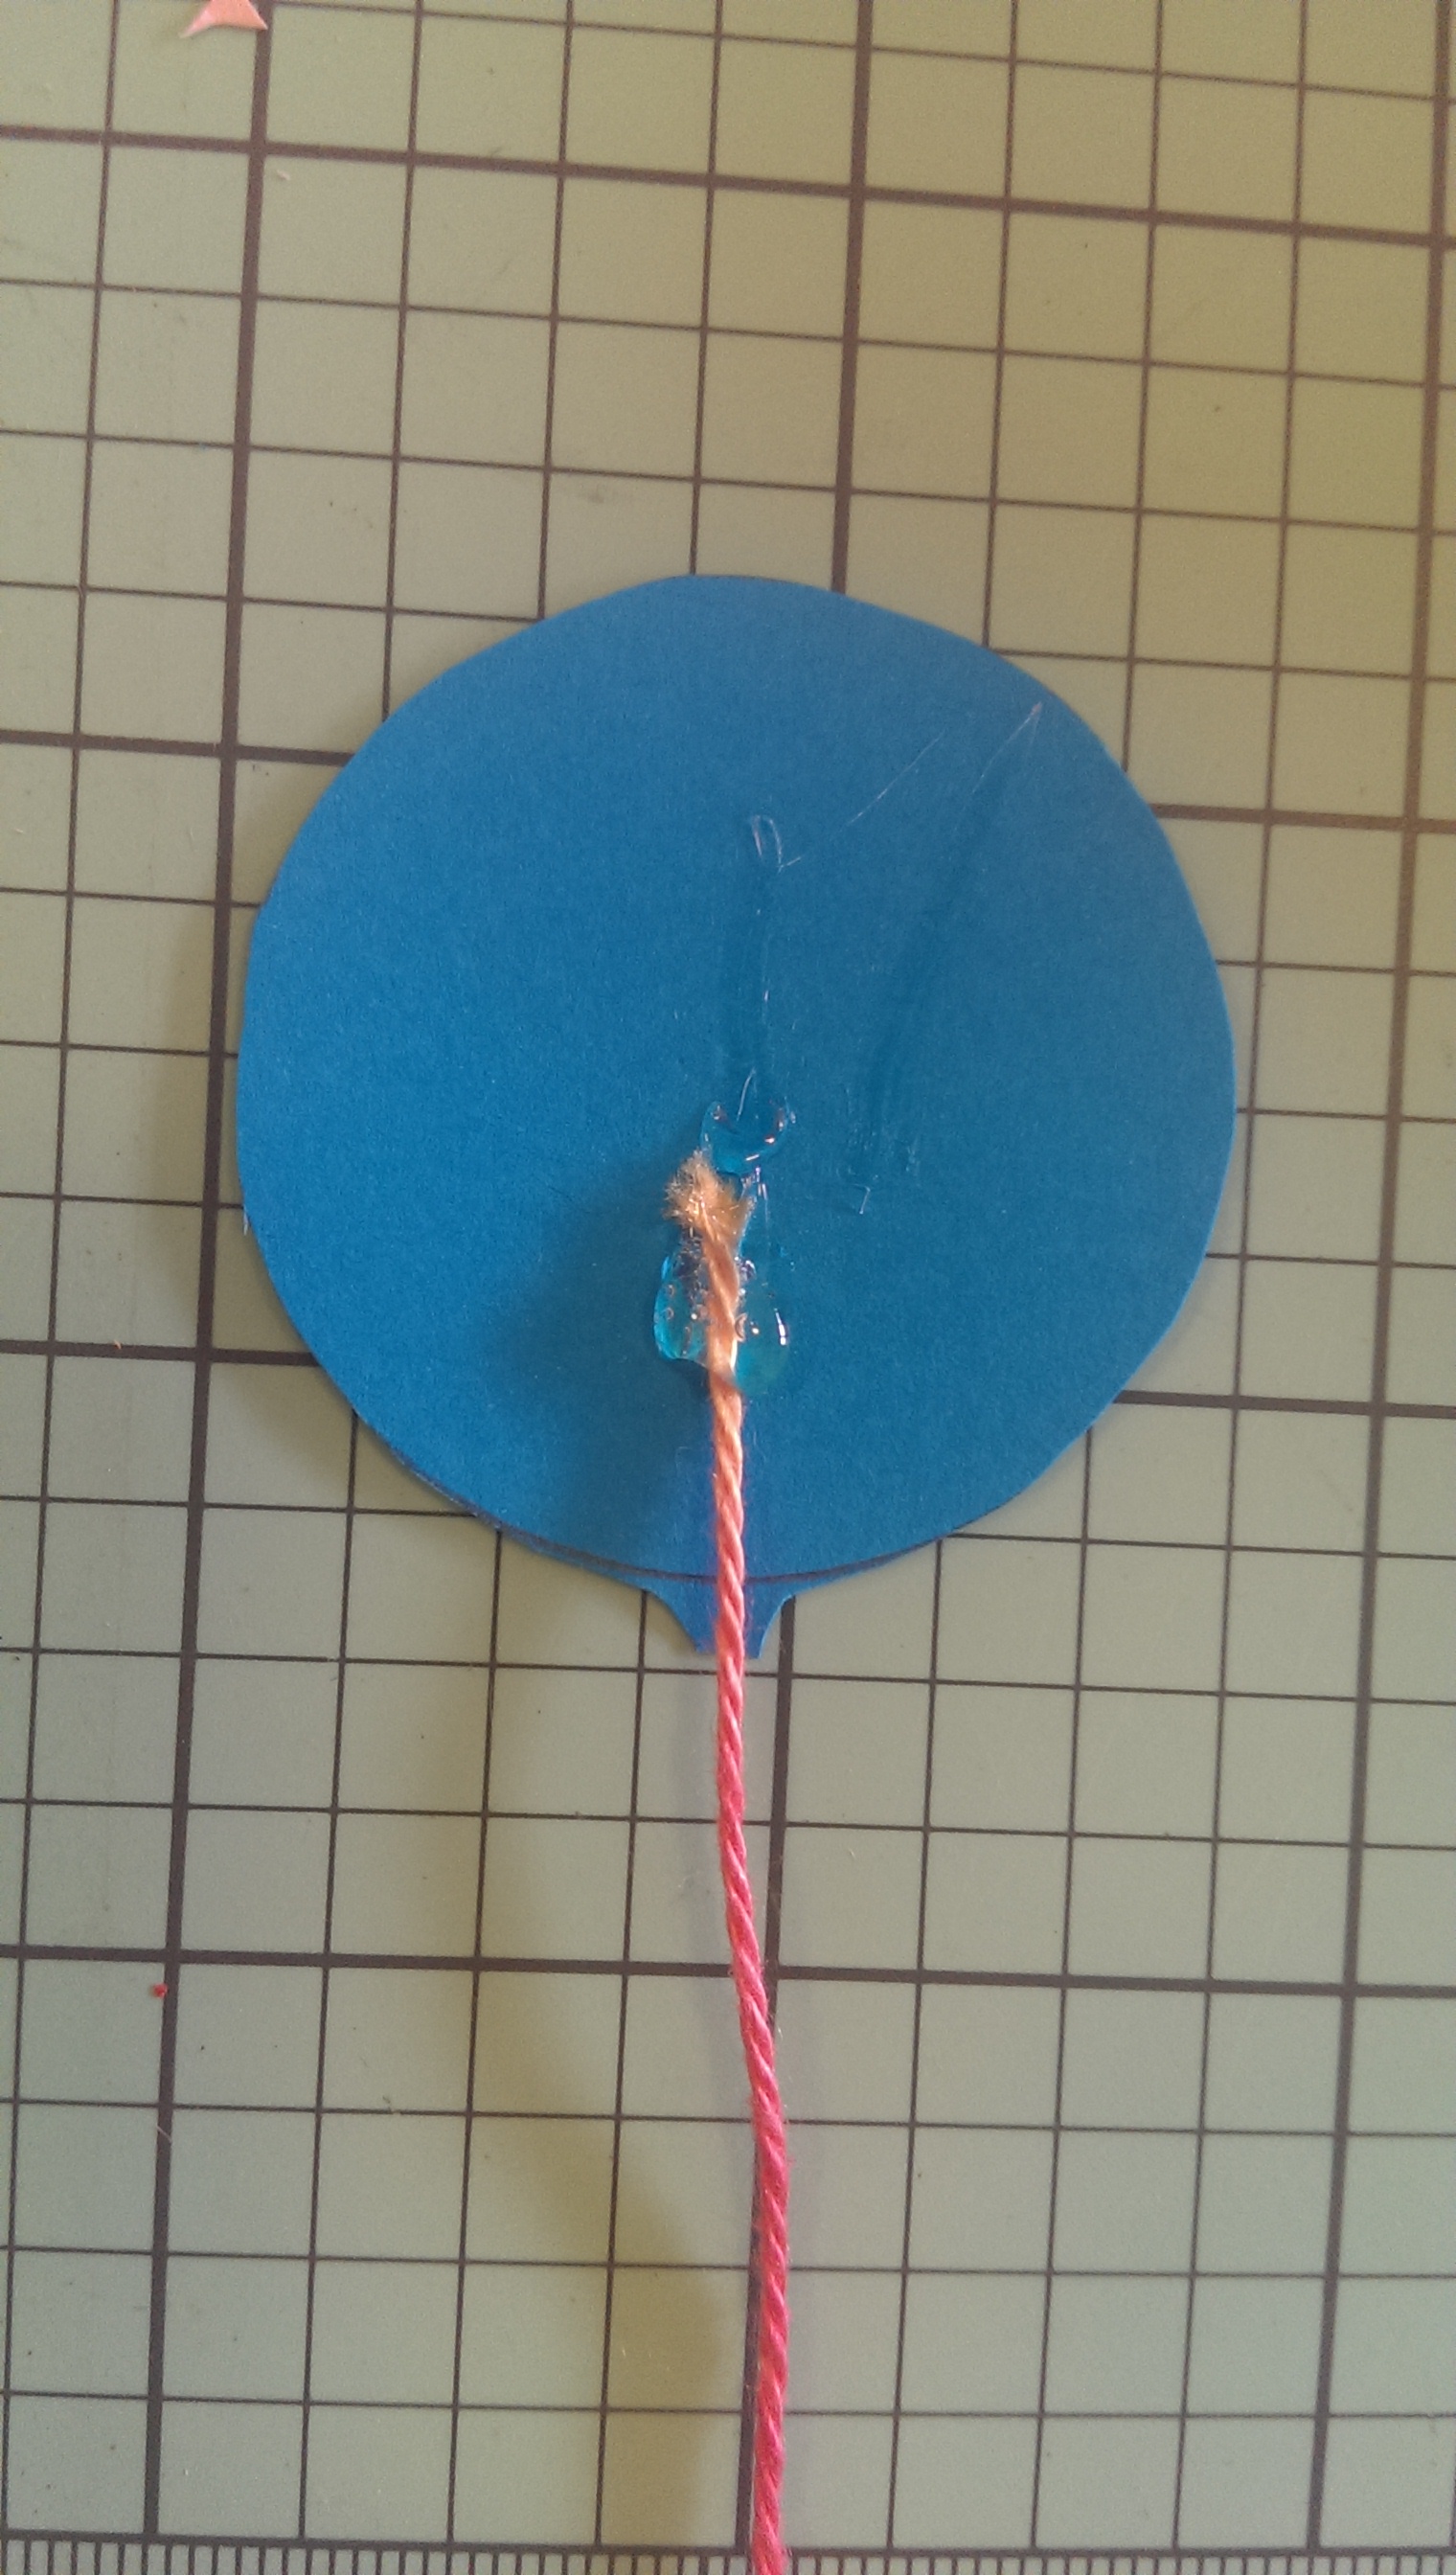
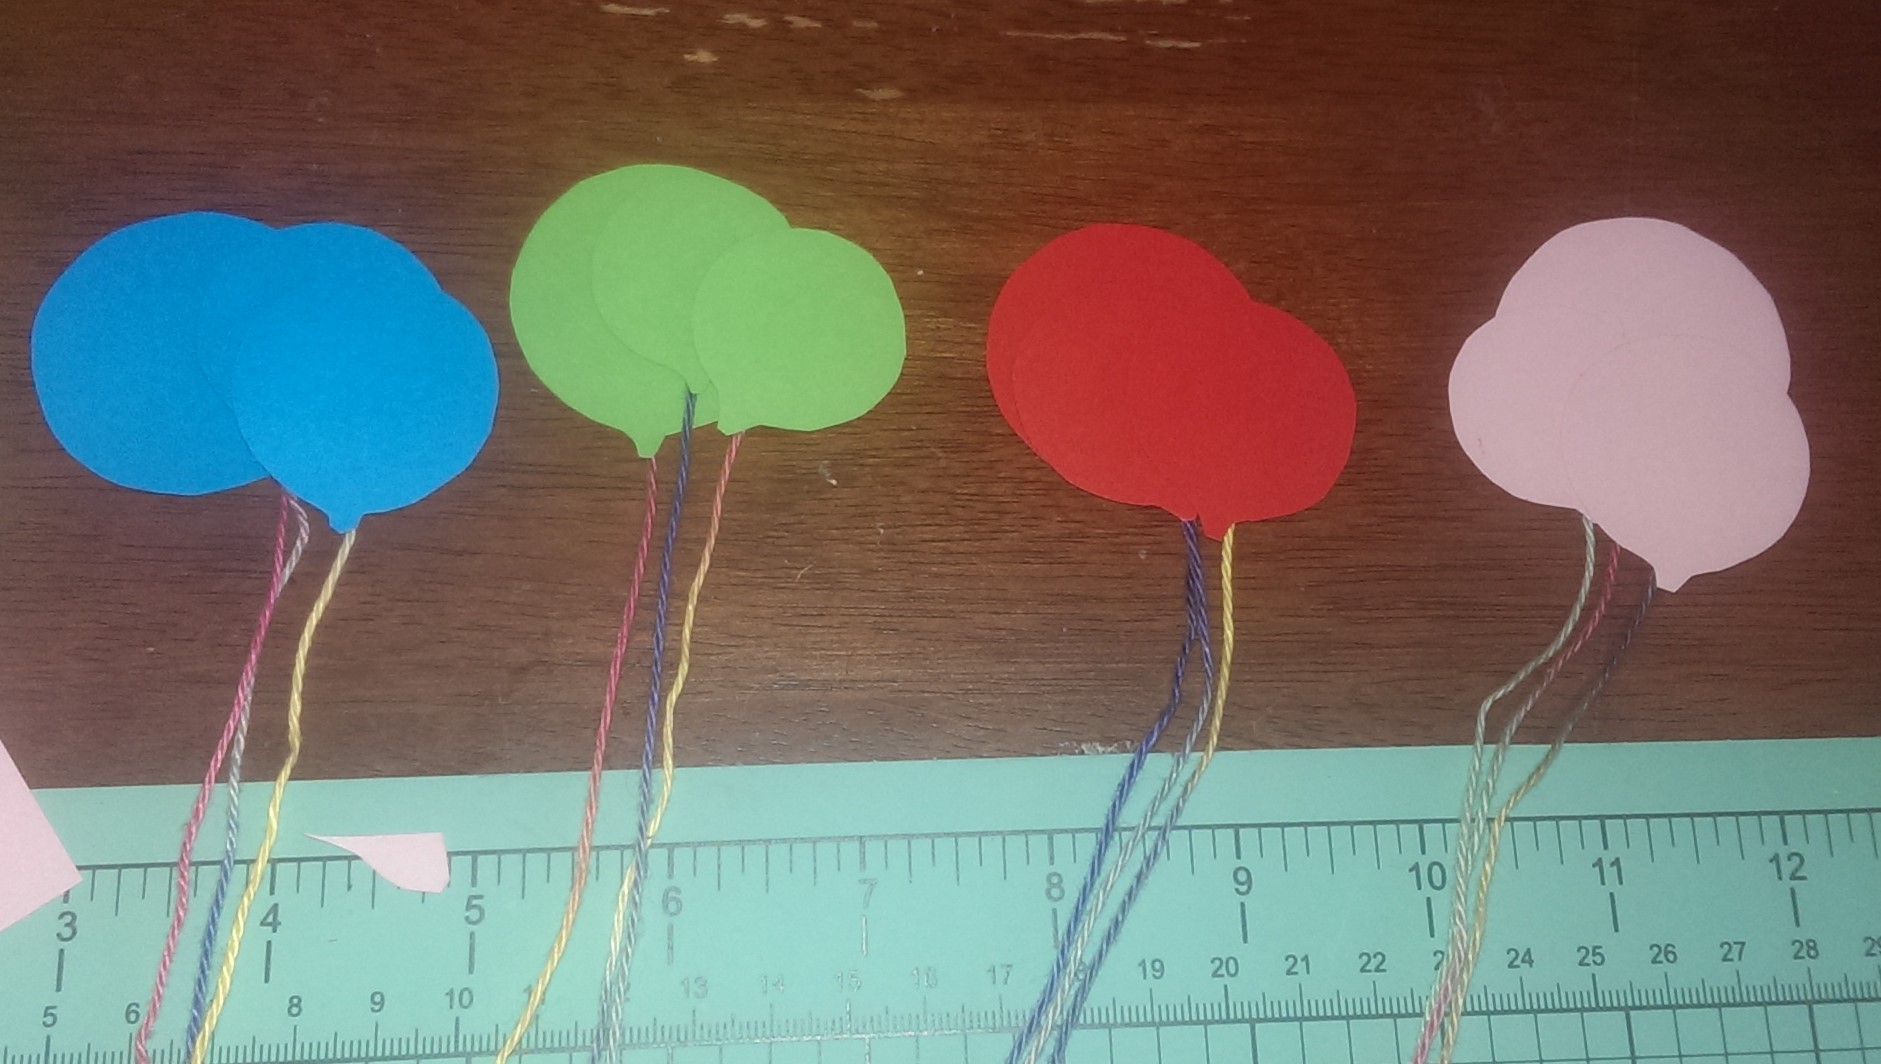
Start by tracing out your balloon shapes and cut them out. I had one large size and two smaller sizes for each colour. Remember to leave a fake balloon tie shape at the end of your oval or circle.
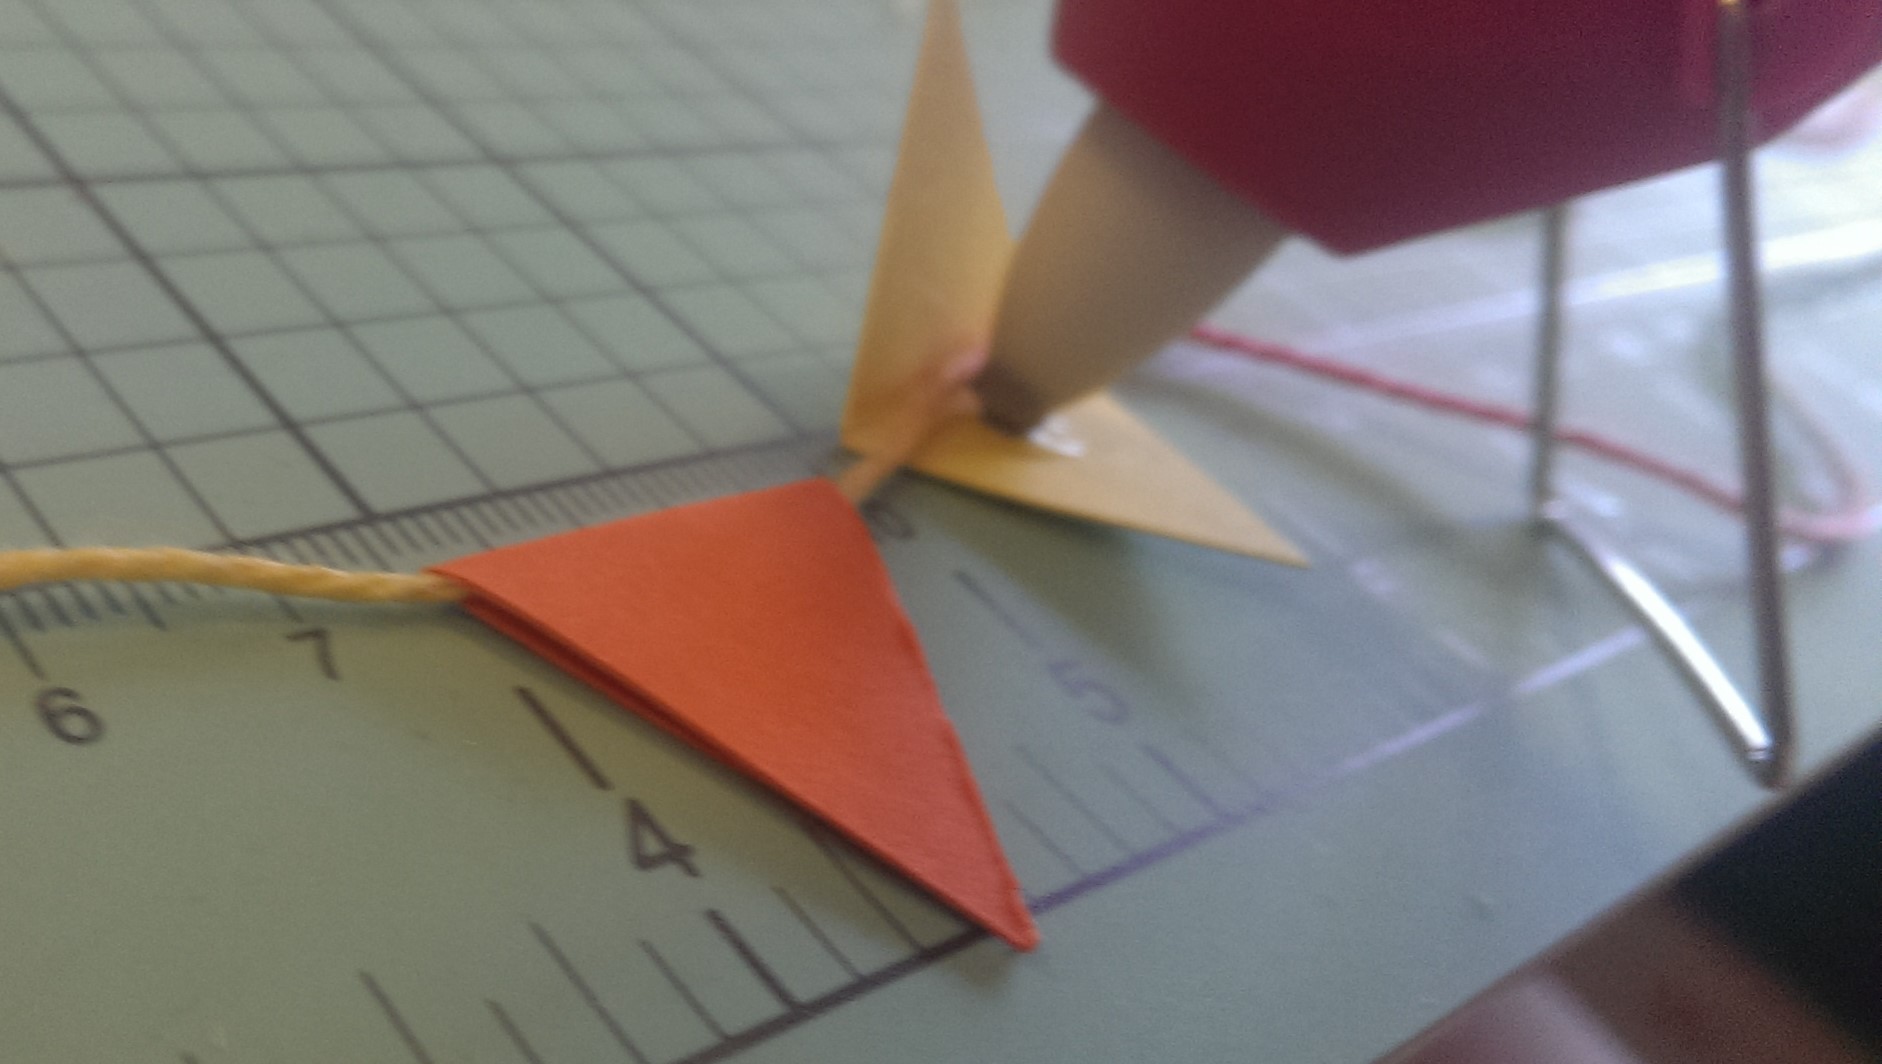
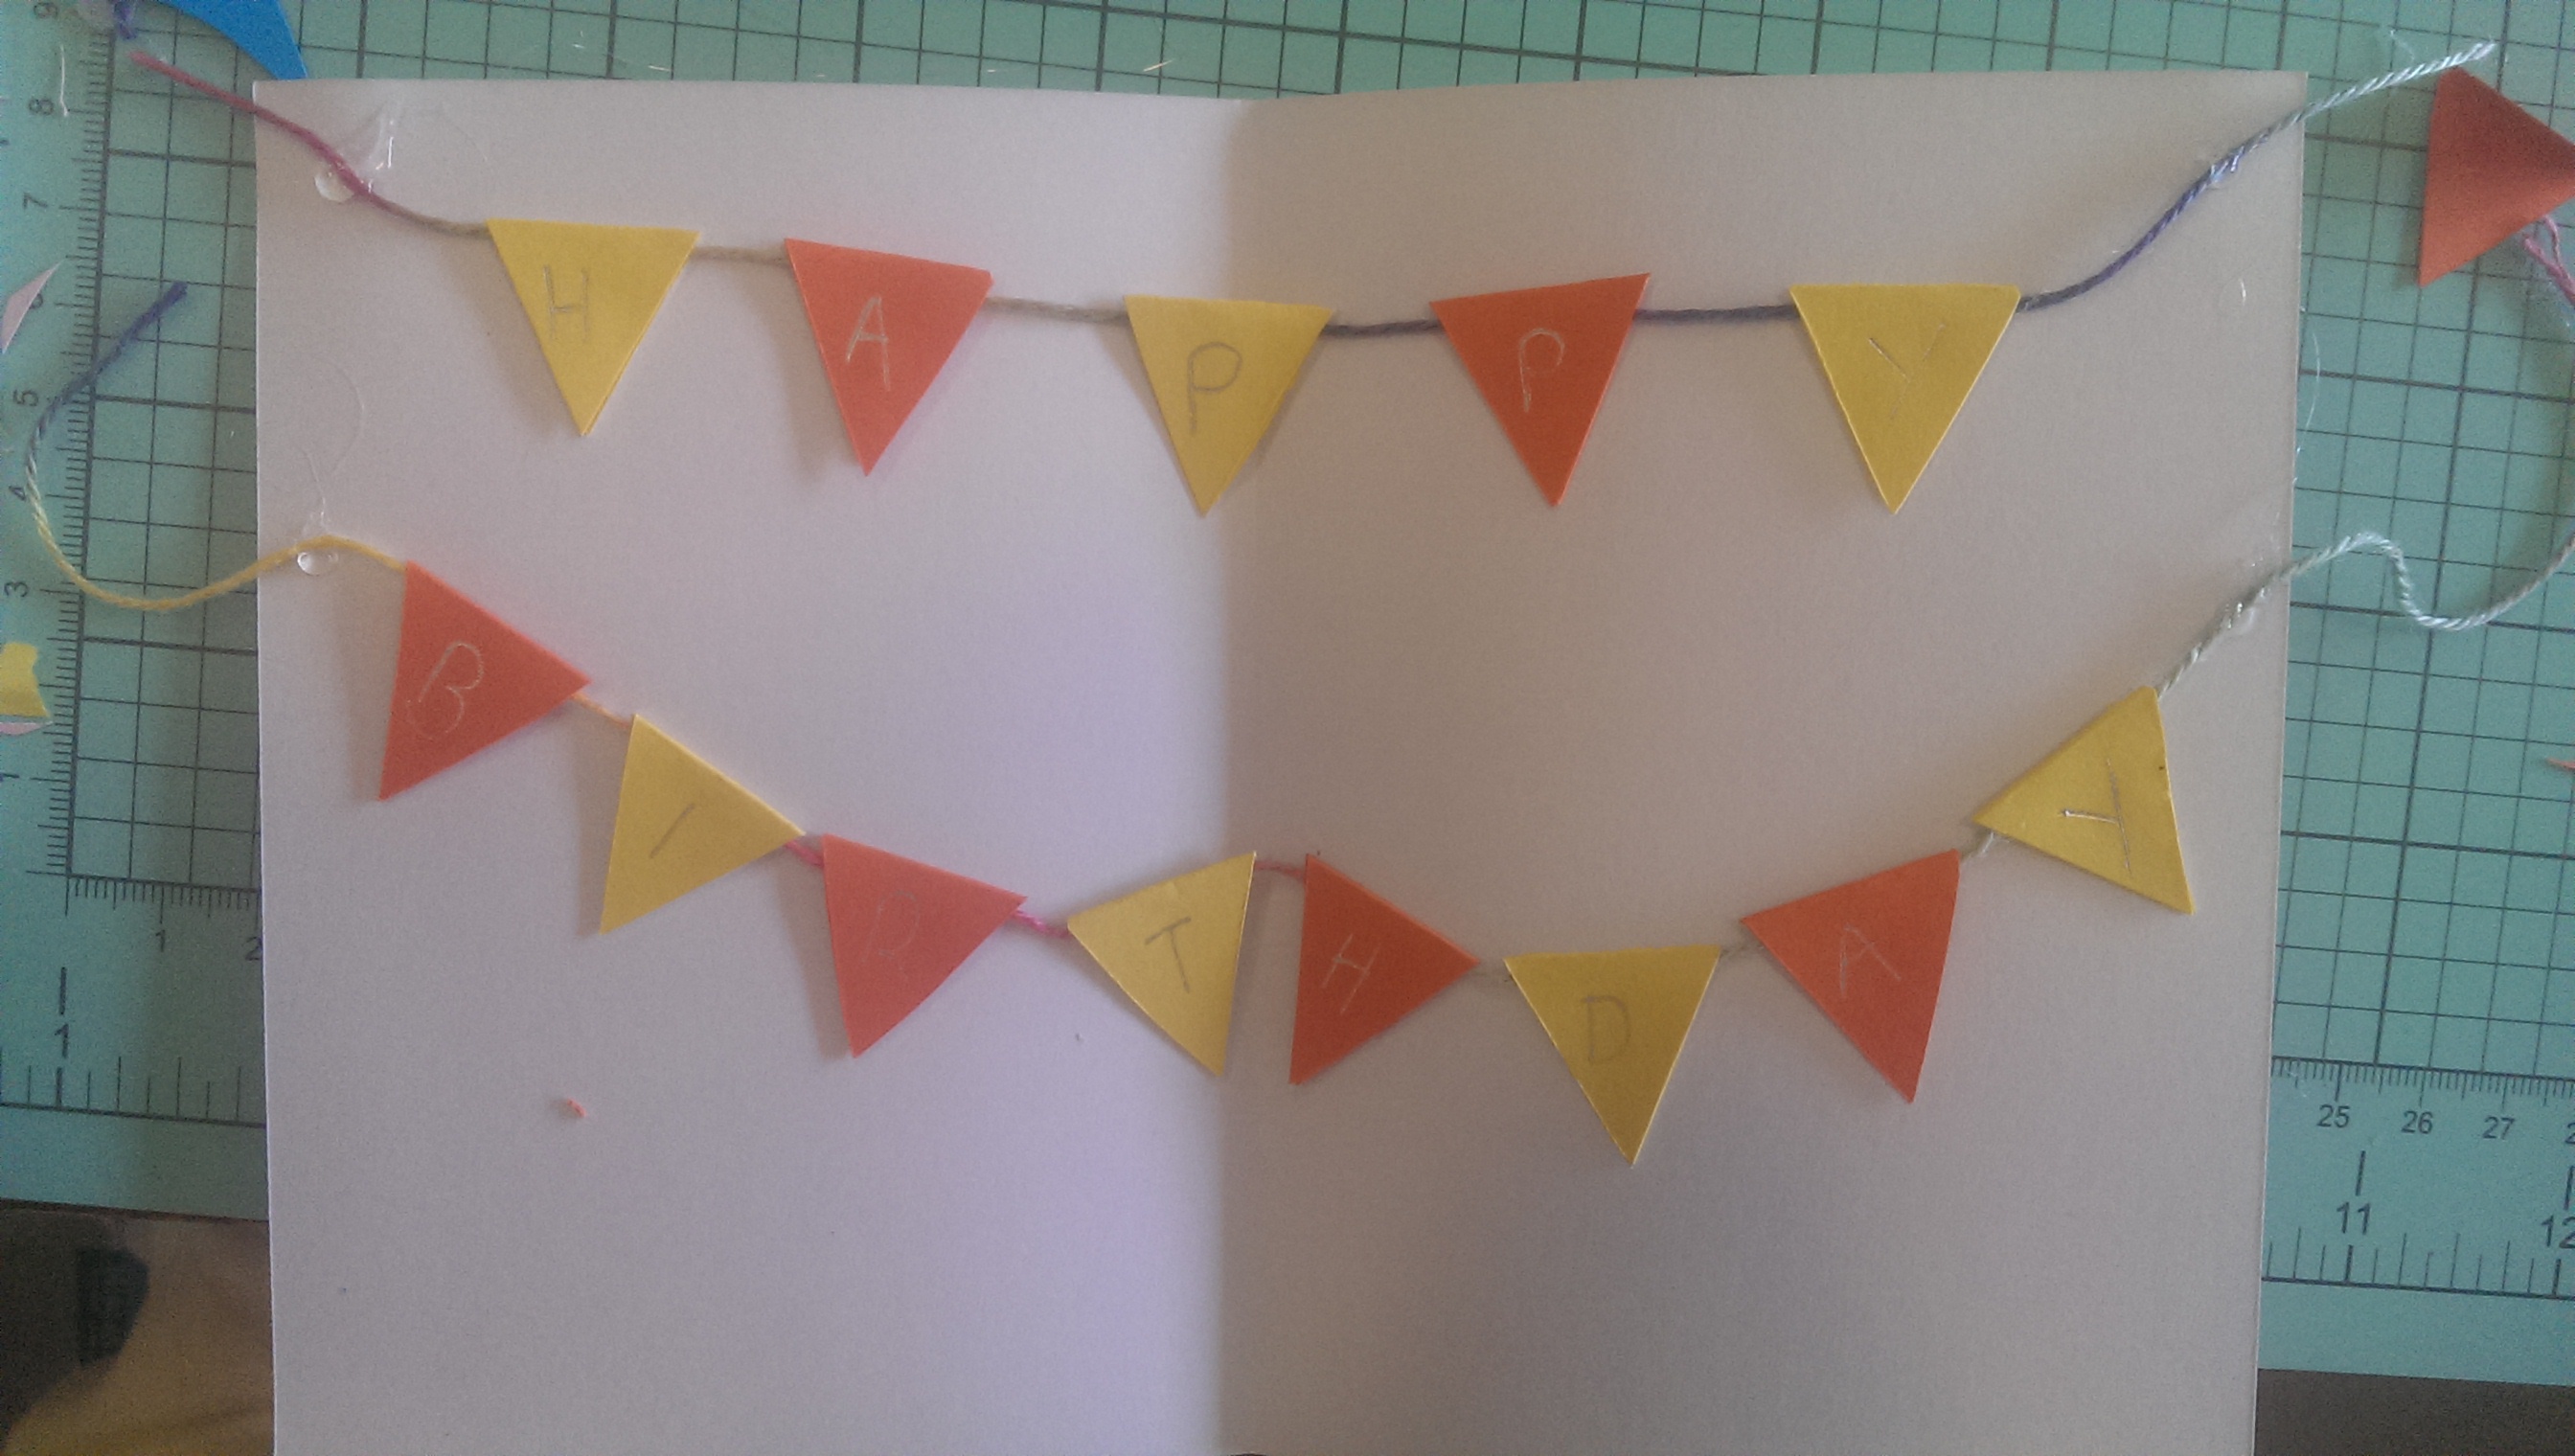
Next to create your bunting sign I traced and cut out thin diamond shapes, so as to fold over into a triangle. They don’t have to match up perfectly, but remember to have the smaller daggier side to sit behind. I used the paper bone scorer to make a crease to make folding a breeze.
Next lay out some string. Cut two long pieces, (size variable to your card size) and lay flat. Start by gluing the diamond/triangles to come together with the string lying flat at the fold part. You can either confidently glue the string in the process, or as I did try to avoid it so you can shift the triangles later on.
Now once you’ve written letters on each triangle, making a sign (i.e. HAPPY BIRTHDAY or CONGRATULATIONS) you can now glue the two (or one) signs to your card. Just simply glue each string end to opposite sides of the card. (On the inside for the surprise effect!) Allowing some give for the sign to hang once opened.
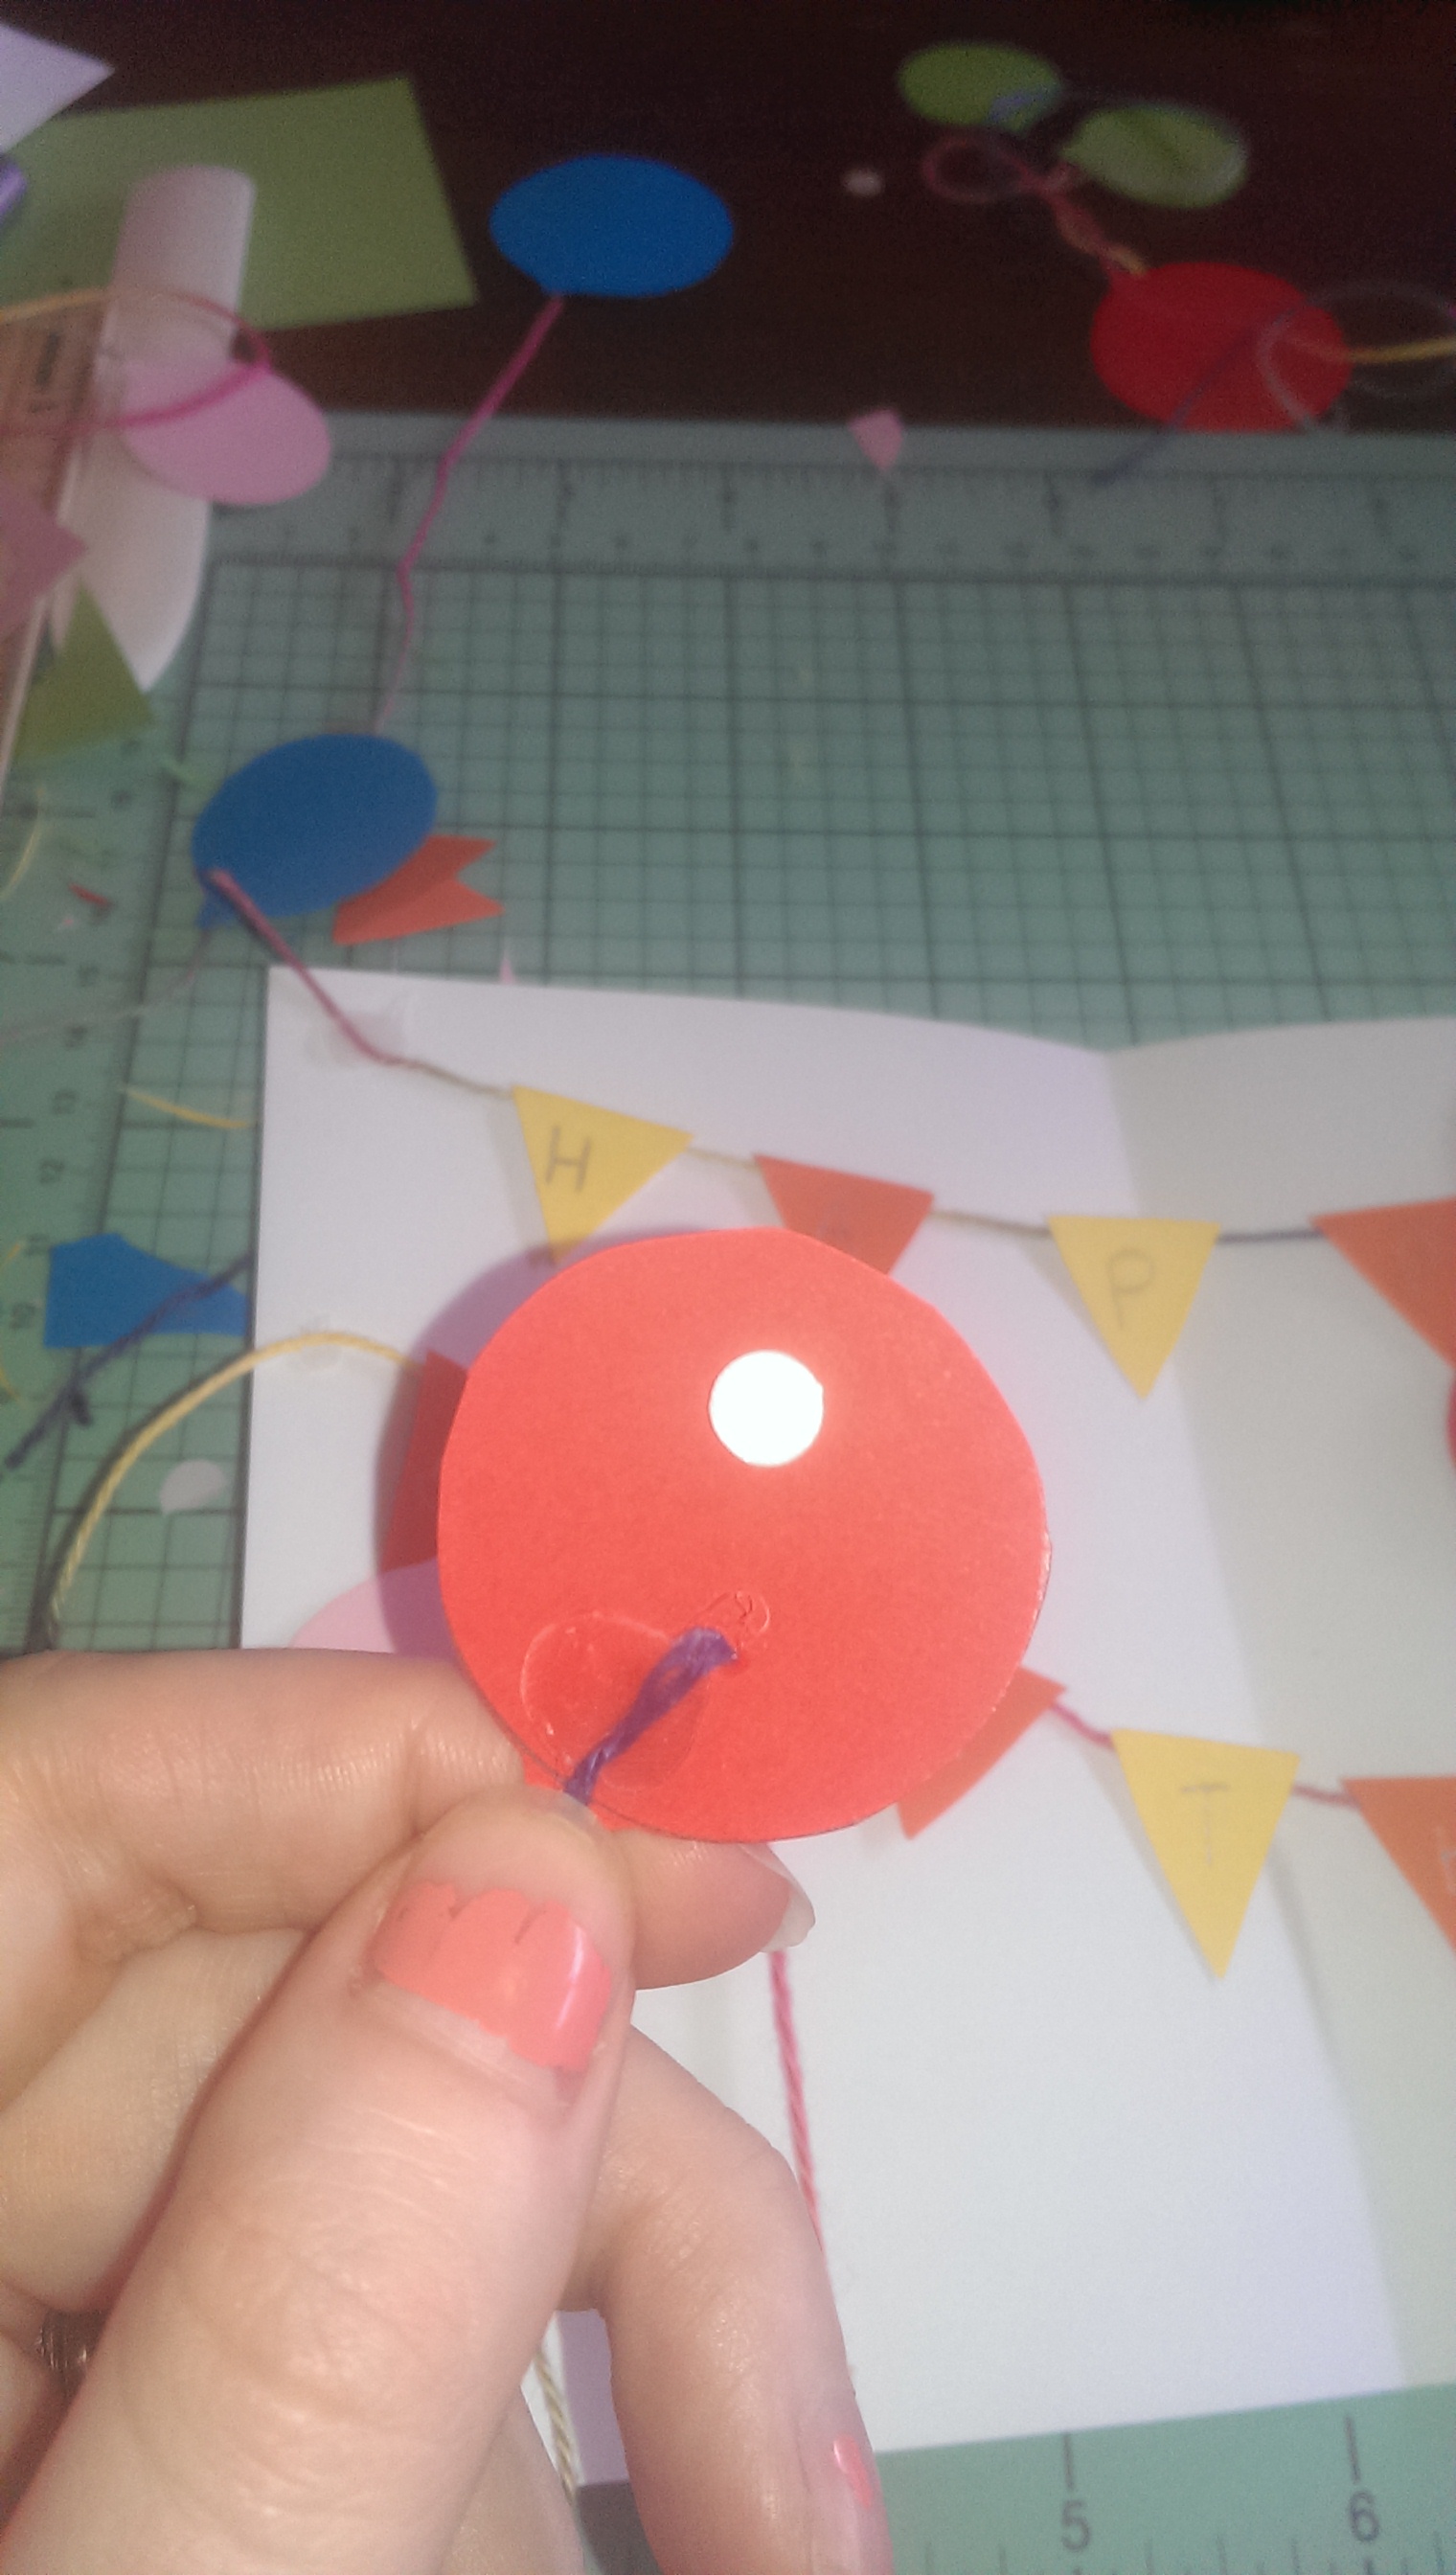
Now, Balloons. Glue on pieces of string on their less attractive sides.
Once complete, start arranging the balloons inside your card. Use a mixture of gluing flat and using foam stickers to give pop out more effect. If you don’t have foam stickers handy, you can always make a paper spring instead!
 Finally, gently gather all the pieces of the string so they look neat and flowing in the same direction. Get another piece of string to tie them together neatly and trim the scraggly bits!
Now you can either leave your message inside the card, or prepare your message to go on the front, a sort of inside out card effect!
Finally make sure your sign is not tangled and all bits fold nicely in the card. Tuck in your string bundle and close the card. Put in an envelope and give to the lucky recipient.
Originally posted 2015-02-19 12:00:23.
This is soo cool!! I have to try it 🙂 What a creative idea. Thanks Ashley!
Thanks Sarah! Hope you have fun making it!